
Before you start
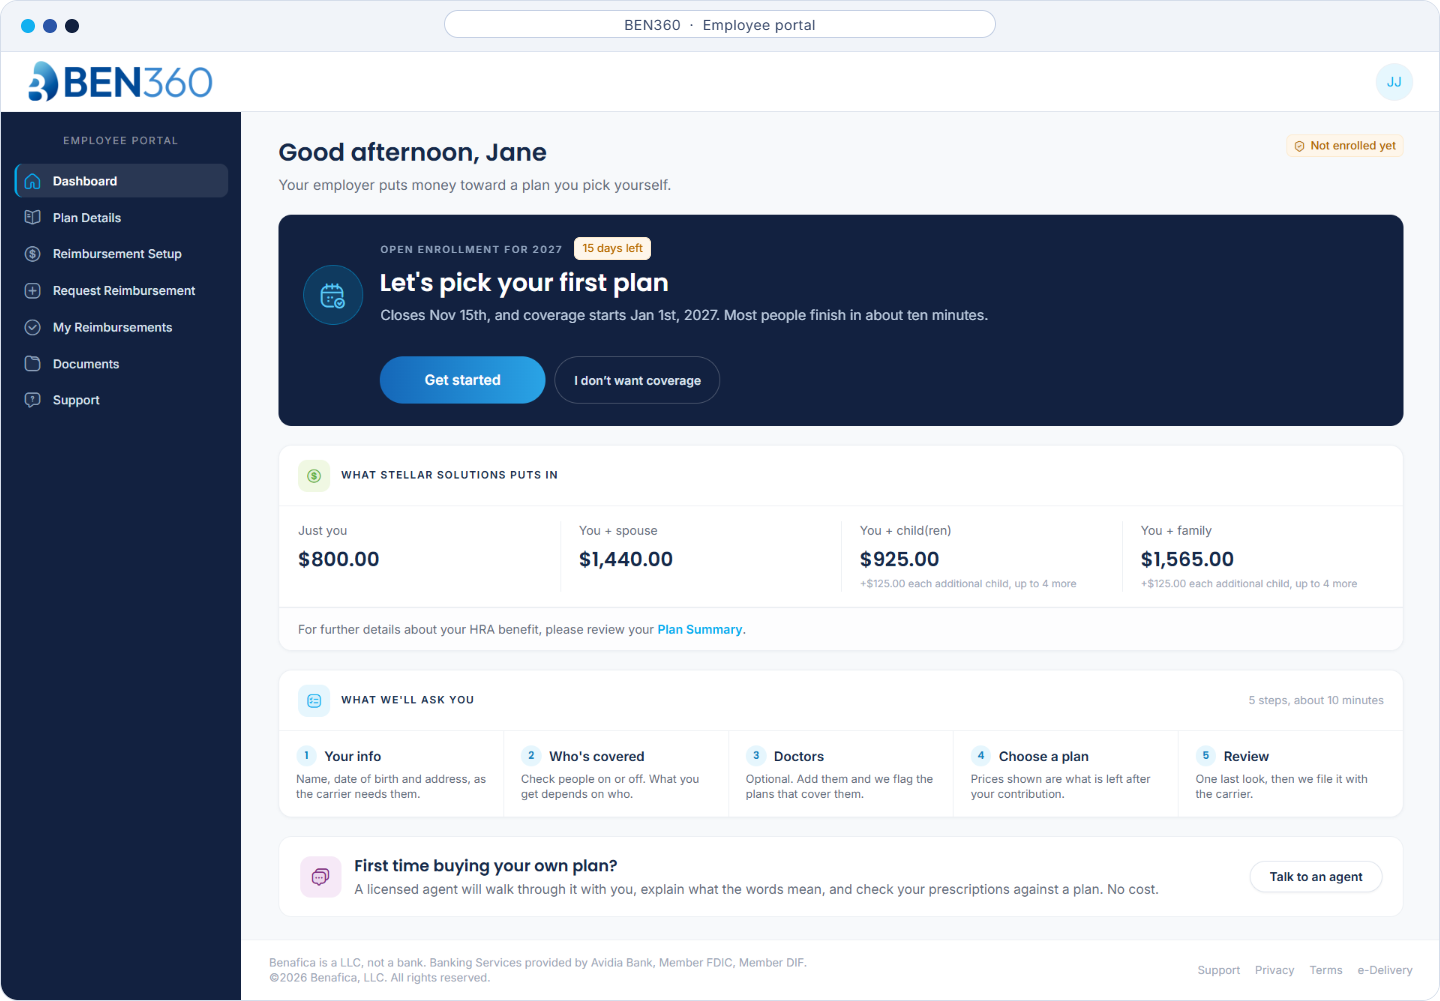
Your dashboard greets you with Let’s pick your first plan. Below it, a table shows what your employer puts in each month, based on who you cover: just you, you and a spouse, you and children, or your family. Your employer’s amounts will differ from any examples you see in training materials.
Select Get started. If you do not want coverage this year, choose I don’t want coverage instead.
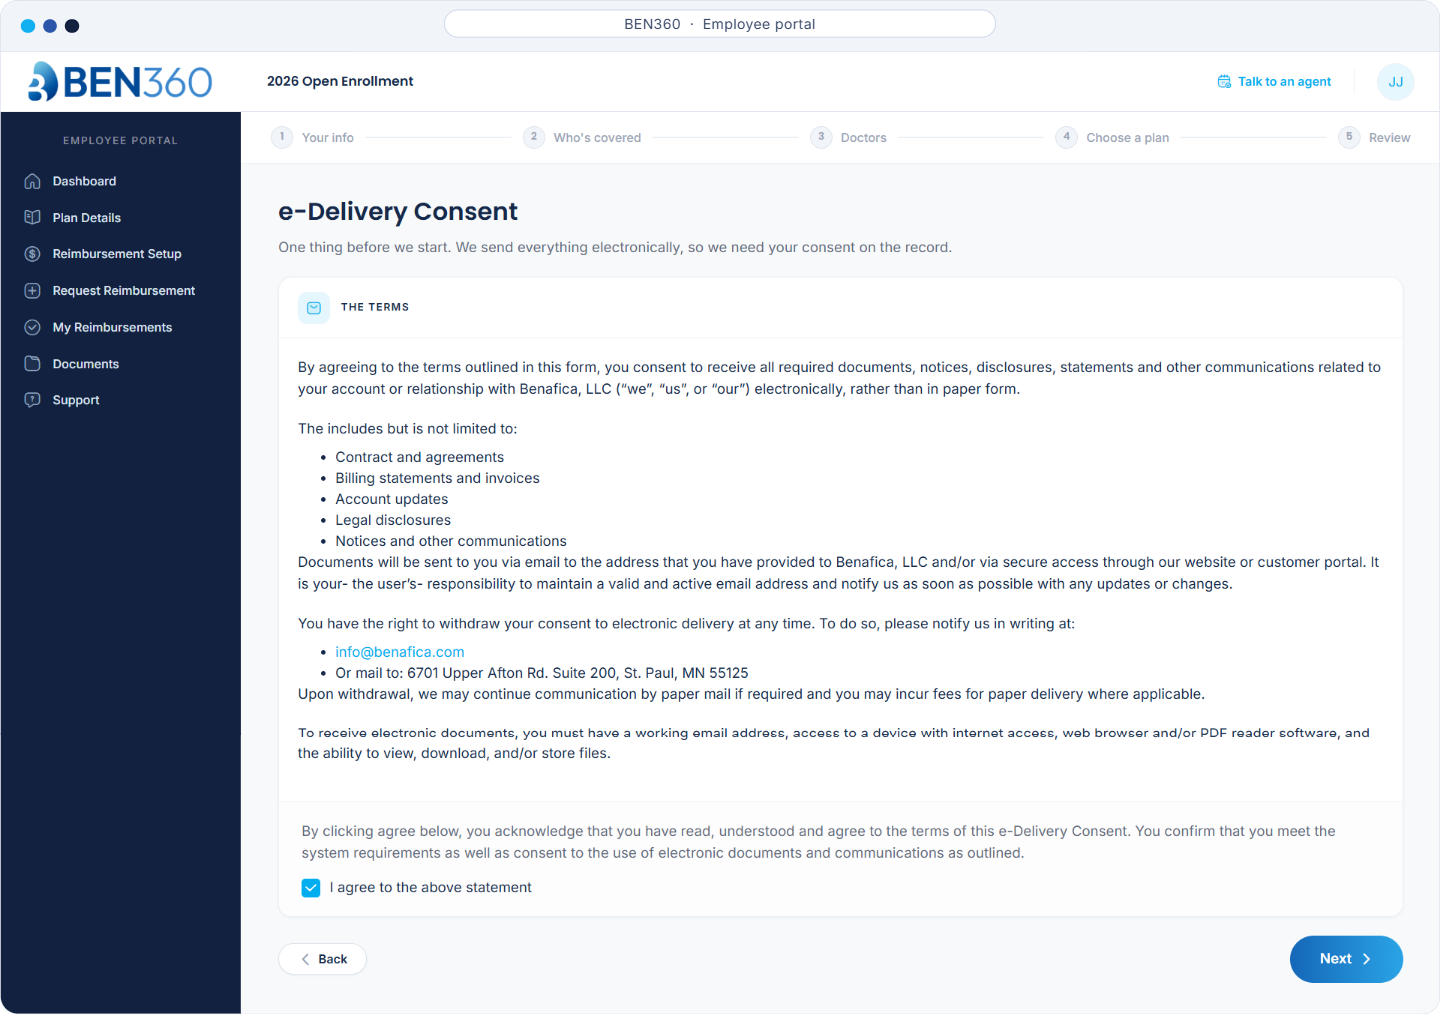
Before you begin, you’ll be asked to agree to receive documents, notices, and statements electronically instead of on paper. To receive them, you need a working email address and a device with internet access, a web browser or PDF reader, and the ability to view, download, or store files.
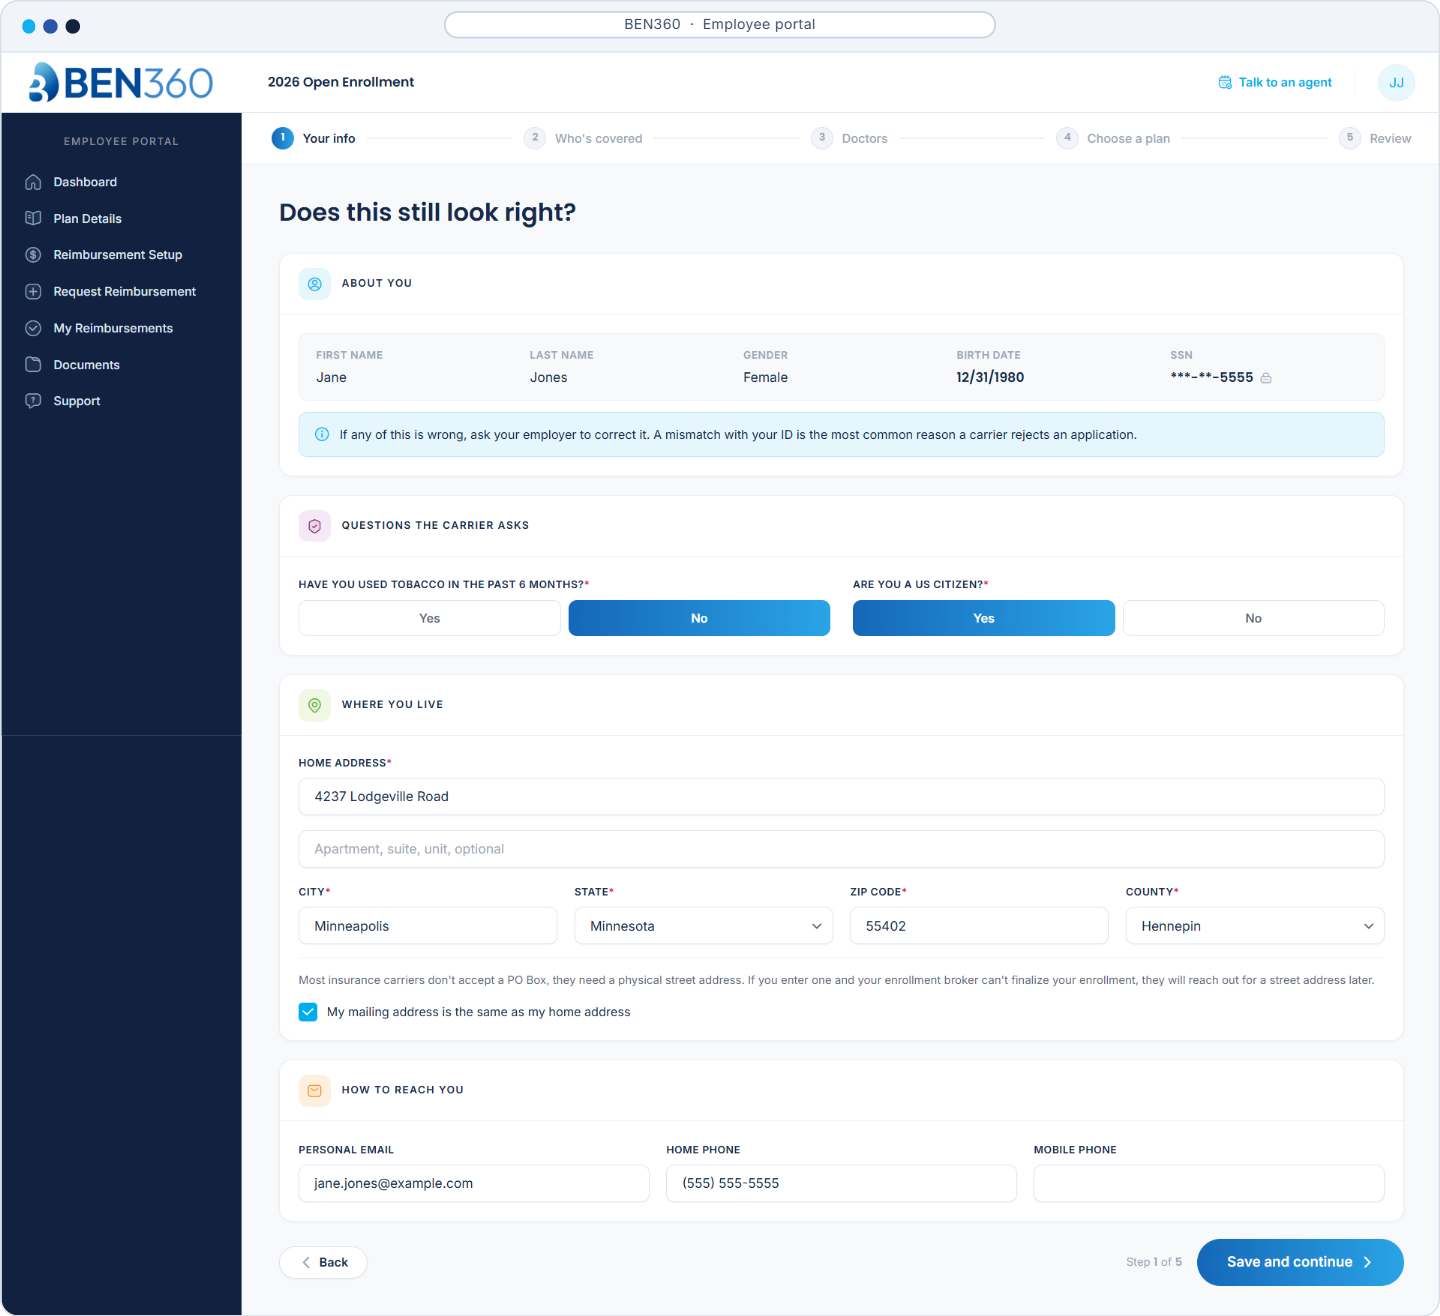
The Does this still look right? screen shows details your employer provided: your name, gender, birth date, and a masked Social Security number. You can’t edit these. If anything is wrong, ask your employer to correct it. A mismatch with your ID is the most common reason a carrier rejects an application, so don’t skip this check.
Then confirm the rest:
Select Save and continue.
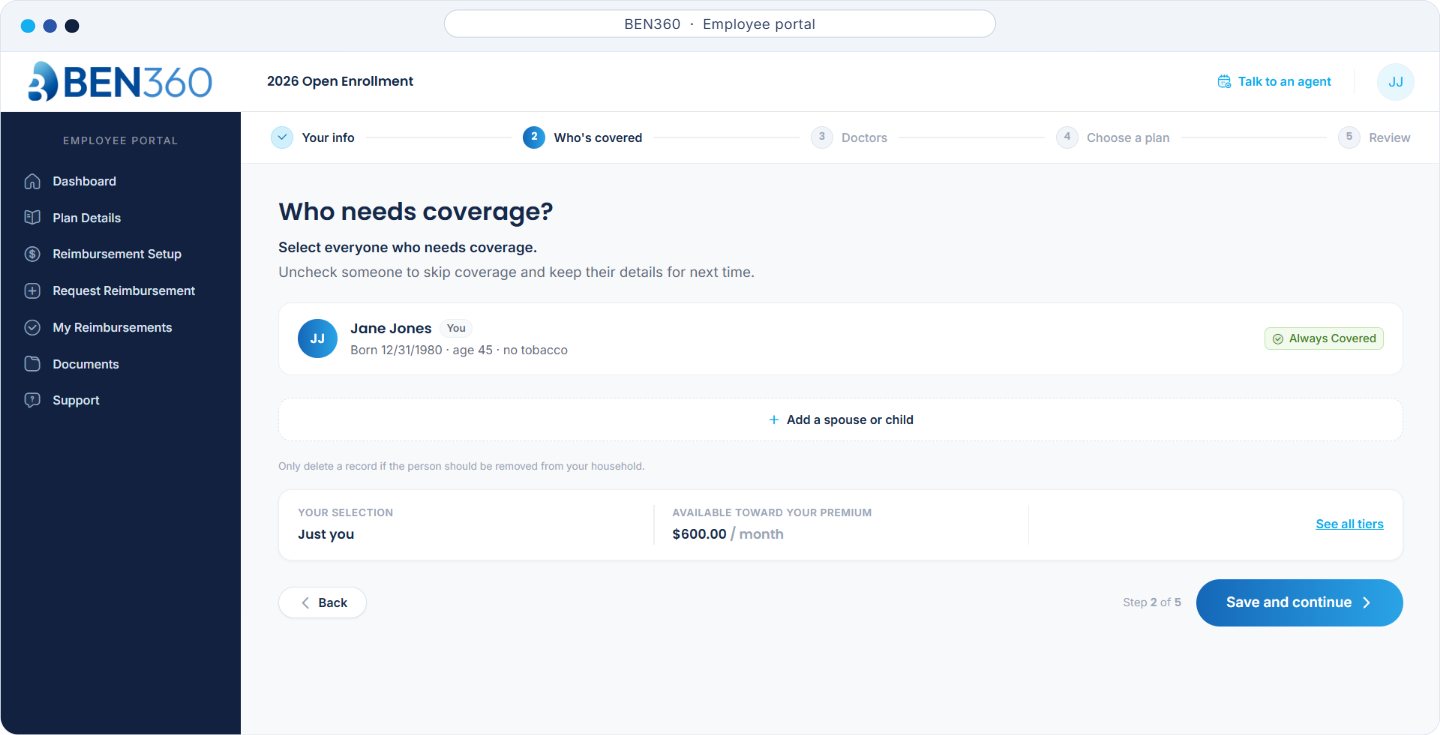
On Who needs coverage? you appear first and are always covered.
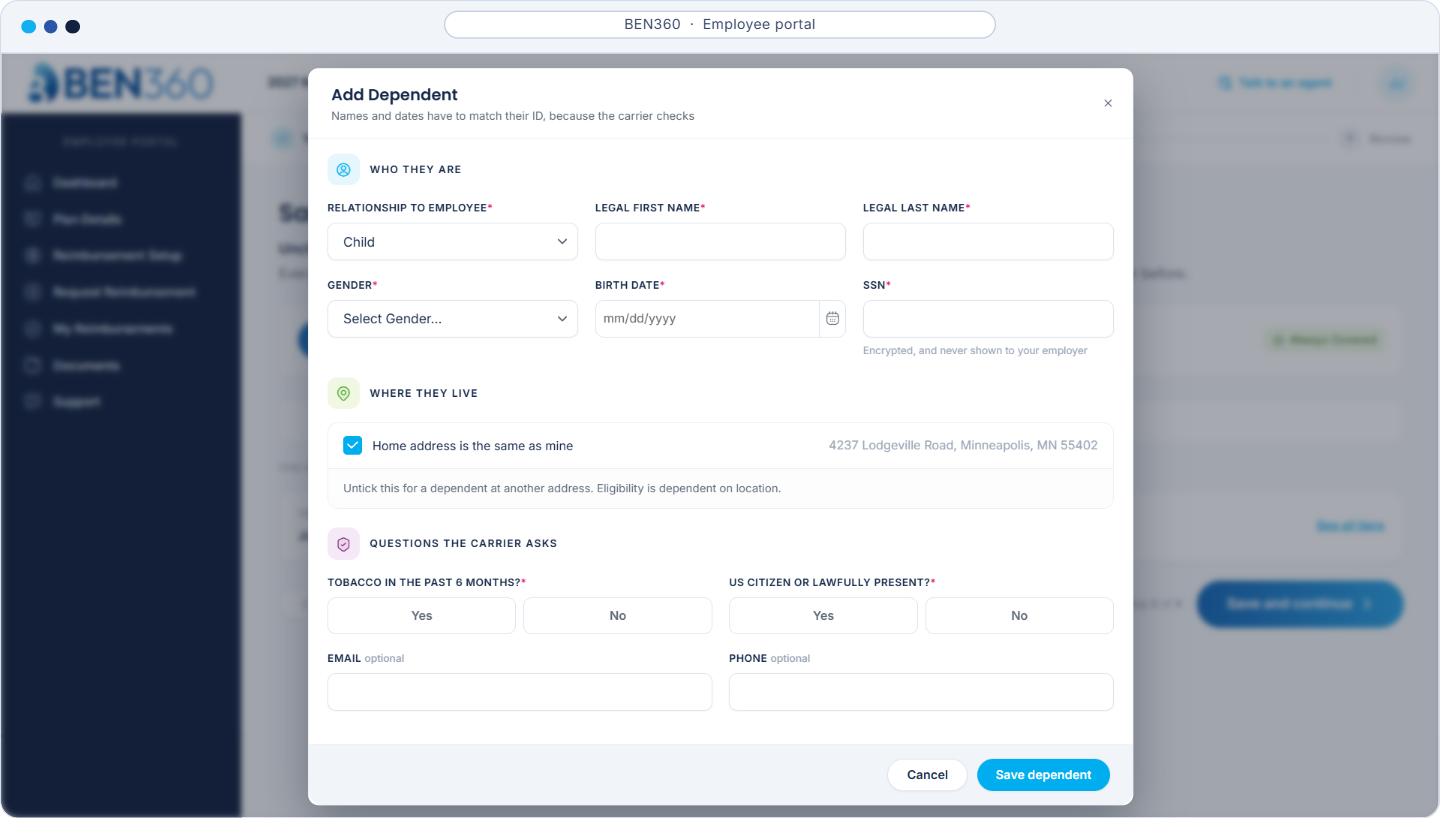
To add a spouse or child, select Add a spouse or child and enter:
Two things to know:
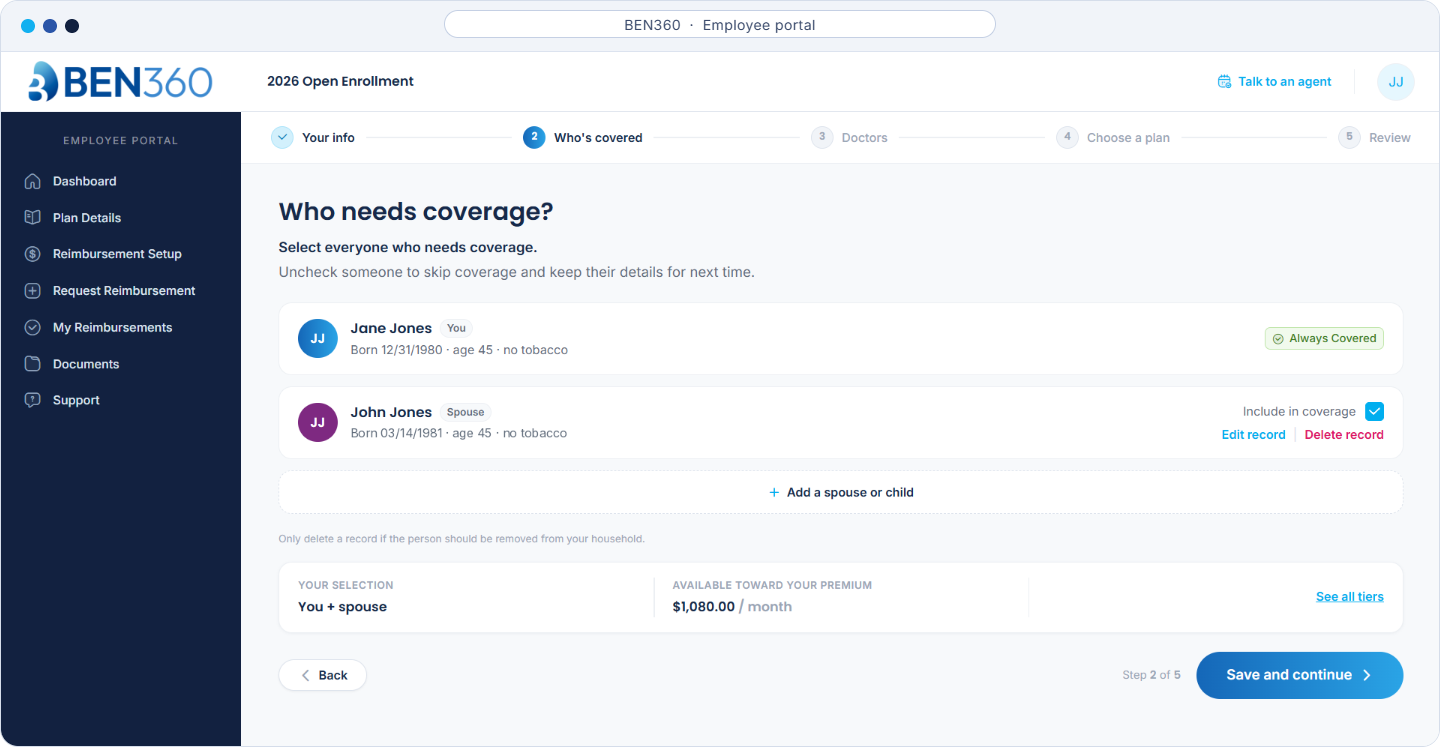
At the bottom, Your selection shows who is covered and how much your employer contributes toward your premium. Uncheck someone to skip their coverage and keep their details for next time. Delete a record only if the person should be removed from your household.
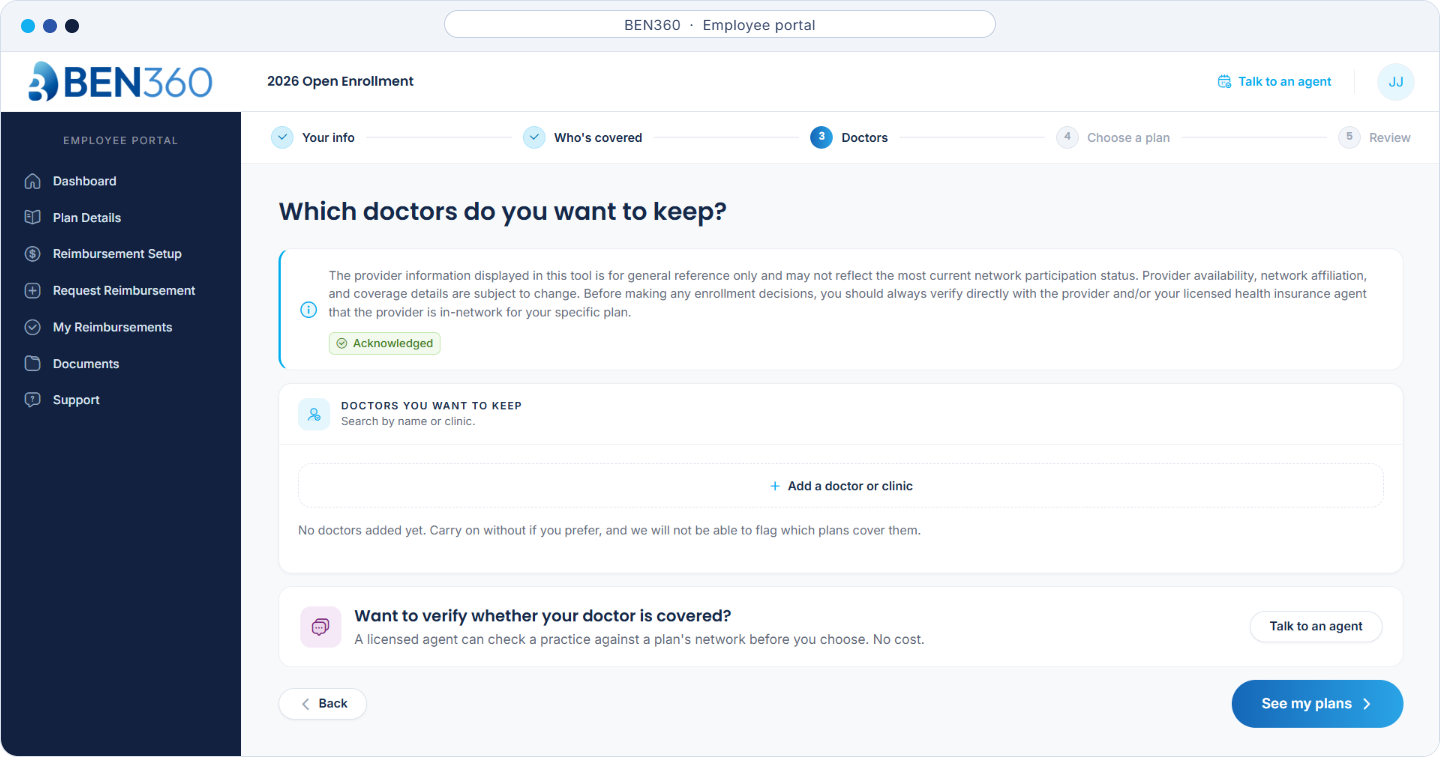
If you want to keep seeing certain doctors, add them here. BEN360 then flags the plans that cover them.
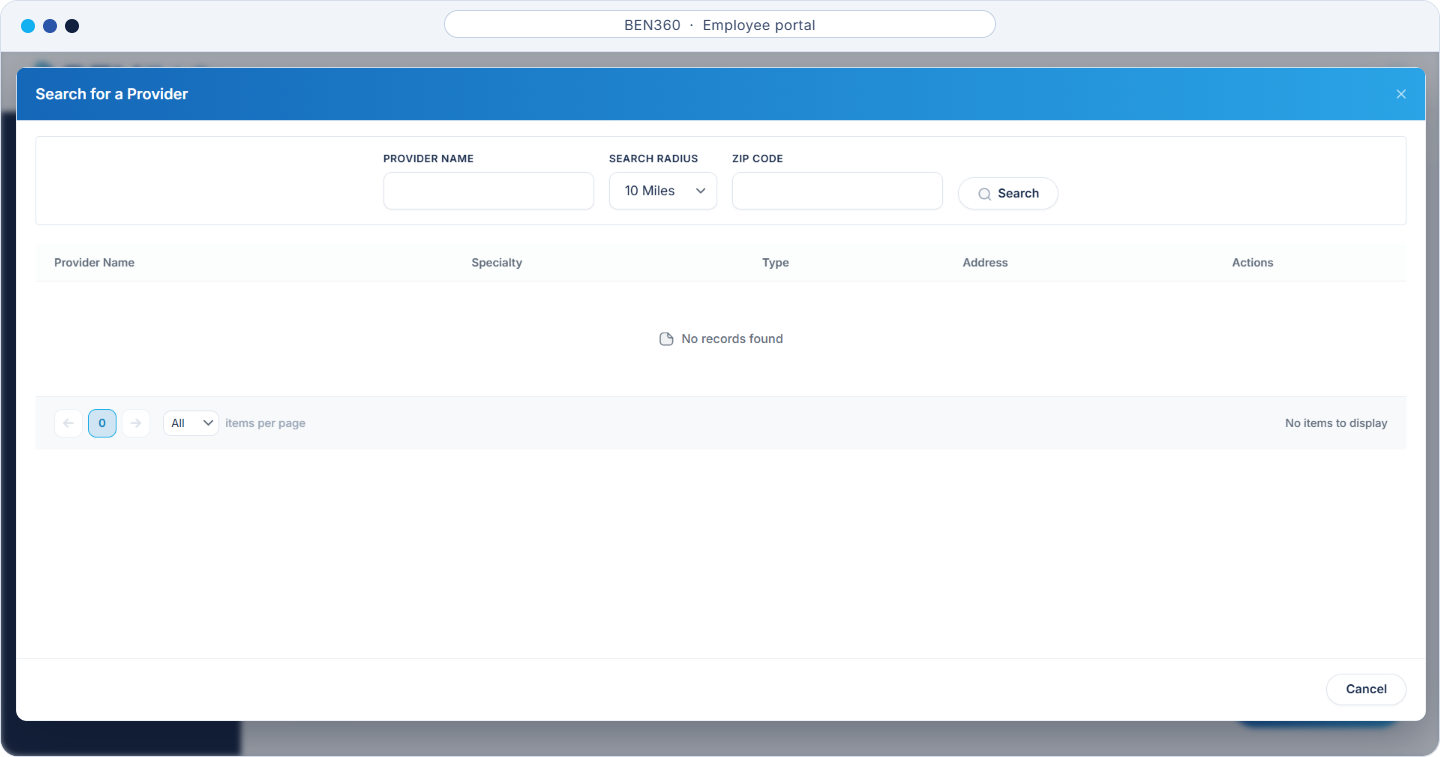
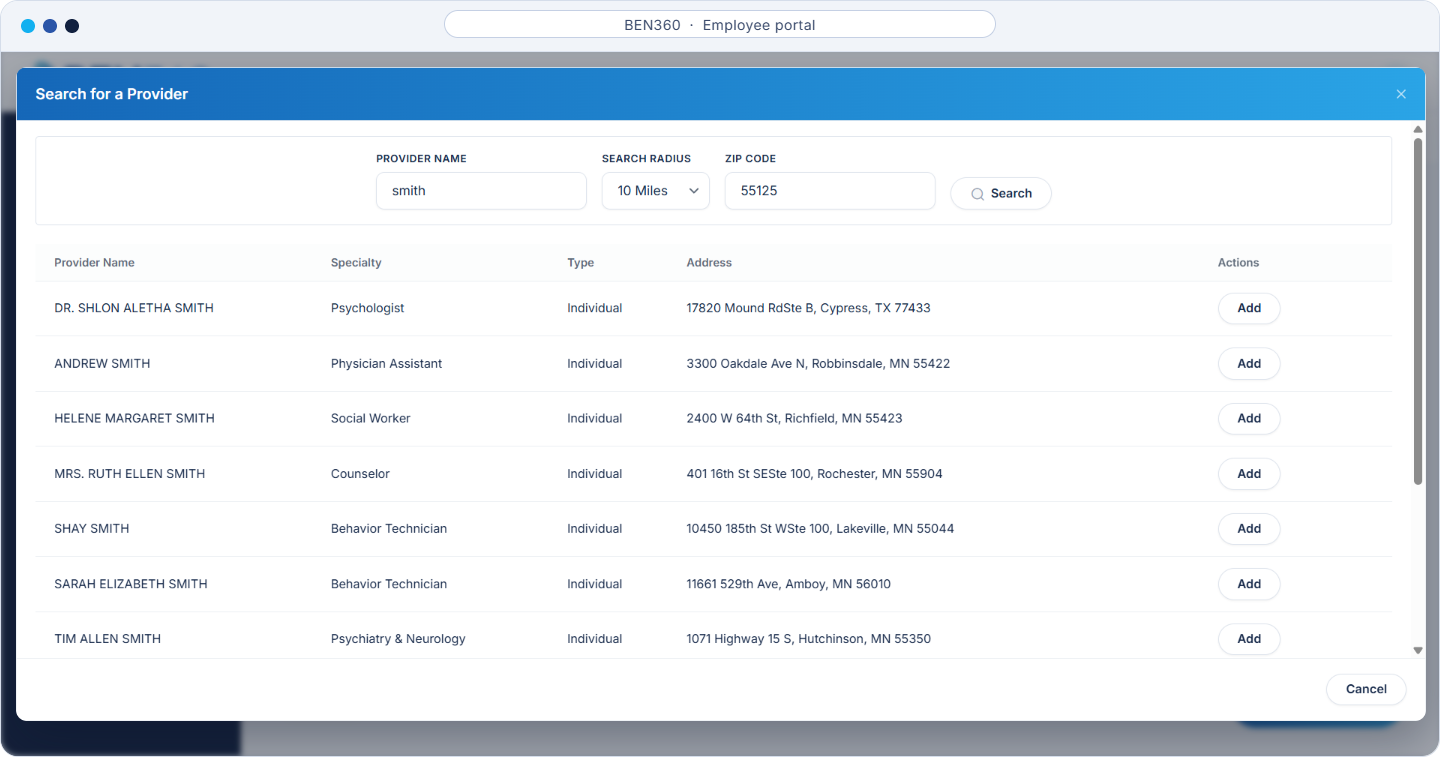
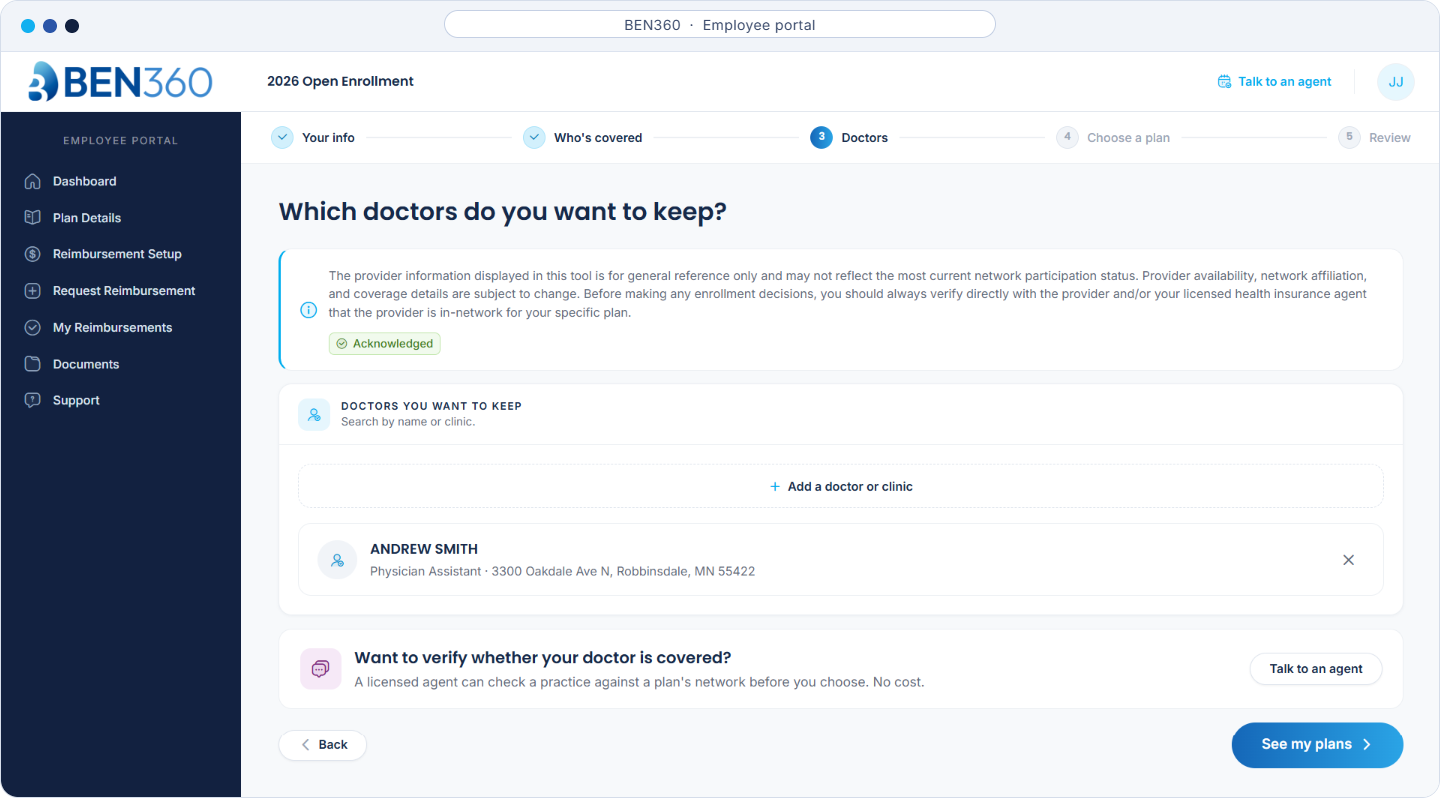
Verify providers before submitting
Provider information in this tool is for general reference and may not reflect current network participation. Before you enroll, confirm with the provider or one of our licensed agents that they are in-network for the specific plan you choose.
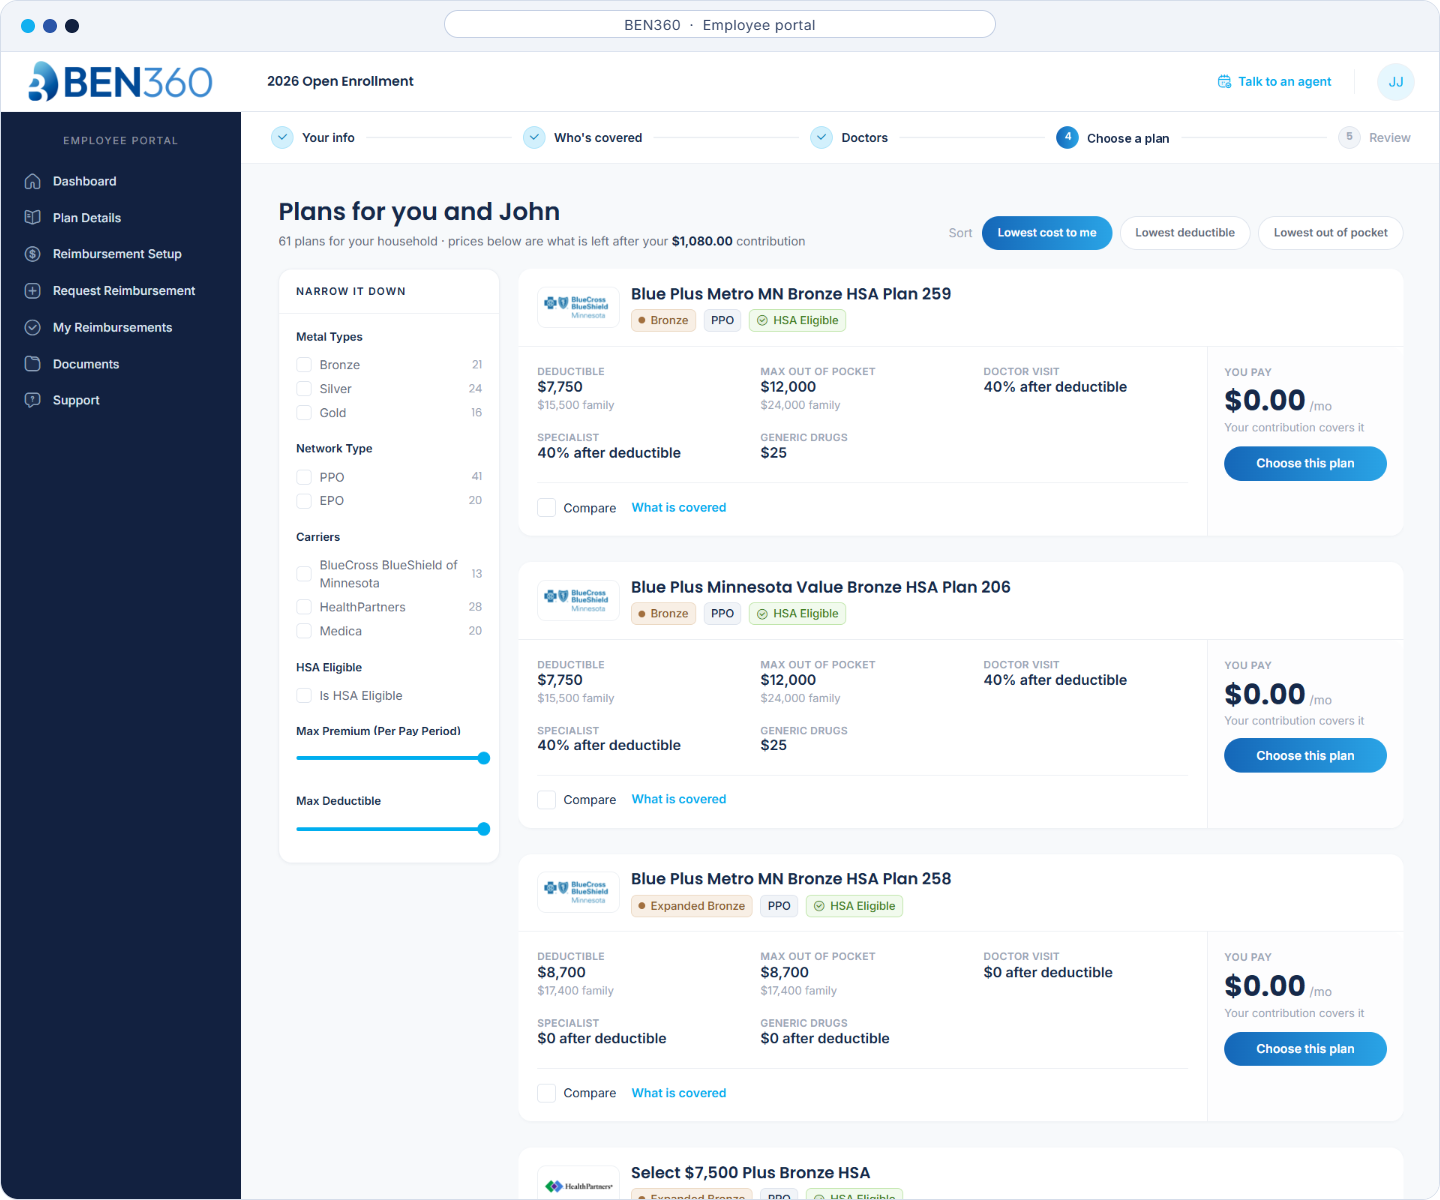
The plan list shows every plan you are eligible for, based on your location and household. The prices shown are what is left after your employer’s contribution, so a plan fully covered by your allowance shows $0.00 a month.
Narrow the list. Use the filters on the left: metal tier, network type, carrier, HSA eligibility, maximum premium, and maximum deductible.
Sort the list. Choose lowest cost to you, lowest deductible, or lowest out-of-pocket maximum.
Read each card. Each plan card shows the deductible, out-of-pocket maximum, doctor and specialist visit costs, and generic drug costs, plus what you pay each month.
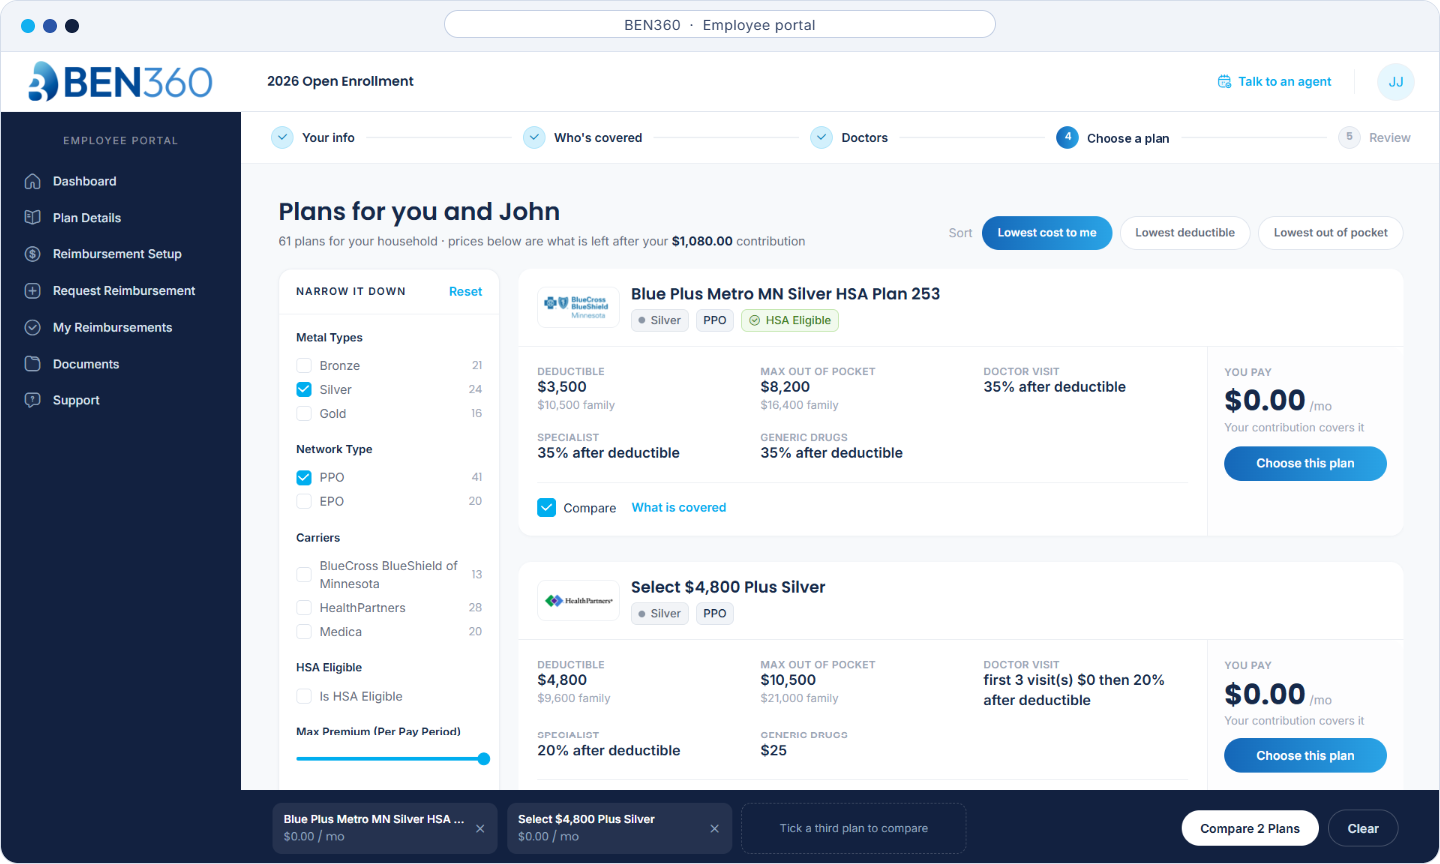
Compare plans. Tick Compare on plans you like. A bar at the bottom of the screen lists your picks. Select Compare Plans to see them side by side, with in-network and out-of-network costs for each. Select Clear to start over.
Look closer. Select What is covered on any card for the full cost and benefit details, including doctor visits, prescriptions, labs, hospital care, mental health, and pregnancy.
When you are ready, select Choose this plan.
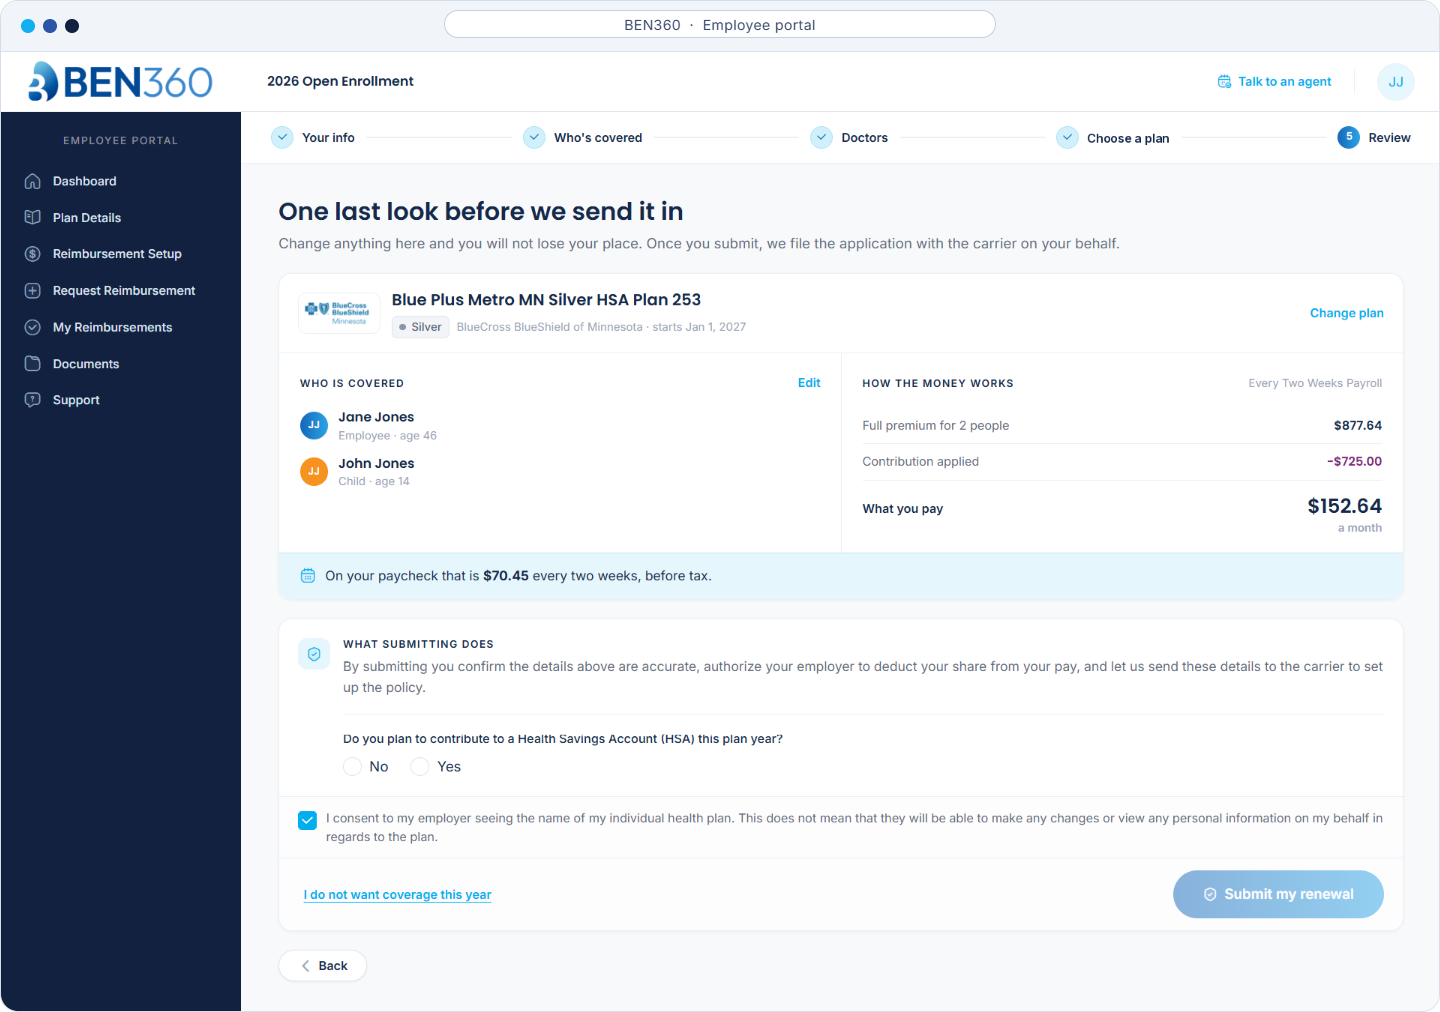
The One last look before we send it in screen summarizes your choice:
You won’t lose your place if you change anything here. Answer the question about whether you plan to contribute to a Health Savings Account (HSA) this plan year, and tick the consent box if you agree to your employer seeing the name of your individual plan. That consent does not let them make changes or see your personal information.
By submitting, you confirm the details are accurate, authorize your employer to deduct your share from your pay, and let Benafica send your details to the carrier to set up your policy. If you decide you don’t want coverage, use I do not want coverage this year.
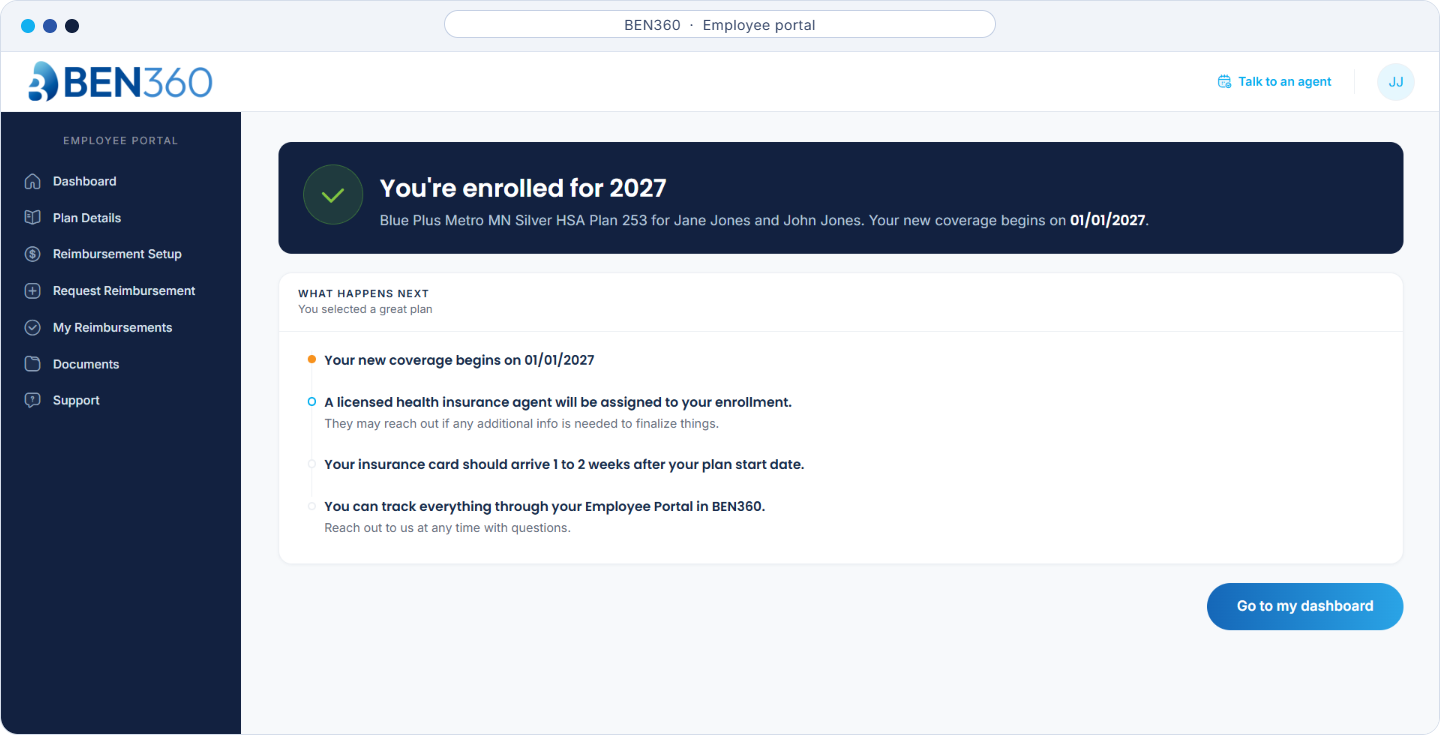
Select Talk to an agent at the top of any screen, or use Book time with an agent when you’re comparing plans. A licensed agent can explain terms, compare plans, and check your prescriptions against a plan at no cost. You can also reach BEN360 support at support@ben-360.com or (651) 358-2987.
Real people are ready to help, by phone, email, or a scheduled call.
Talk to an agent
Schedule time with a licensed counselor from your BEN360 dashboard.
Email support
Call us
651-358-2987 · Mon–Fri, 9 AM–5 PM CT